Stepping onto the salon floor for the first time brings plenty of excitement. You have your station set up, your capes ready, and your shears polished.
One specific tool in your kit can feel a bit intimidating when you first start using it. Learning how thinning shears work will build your confidence behind the chair.
Understanding The Anatomy Of Thinning Shears
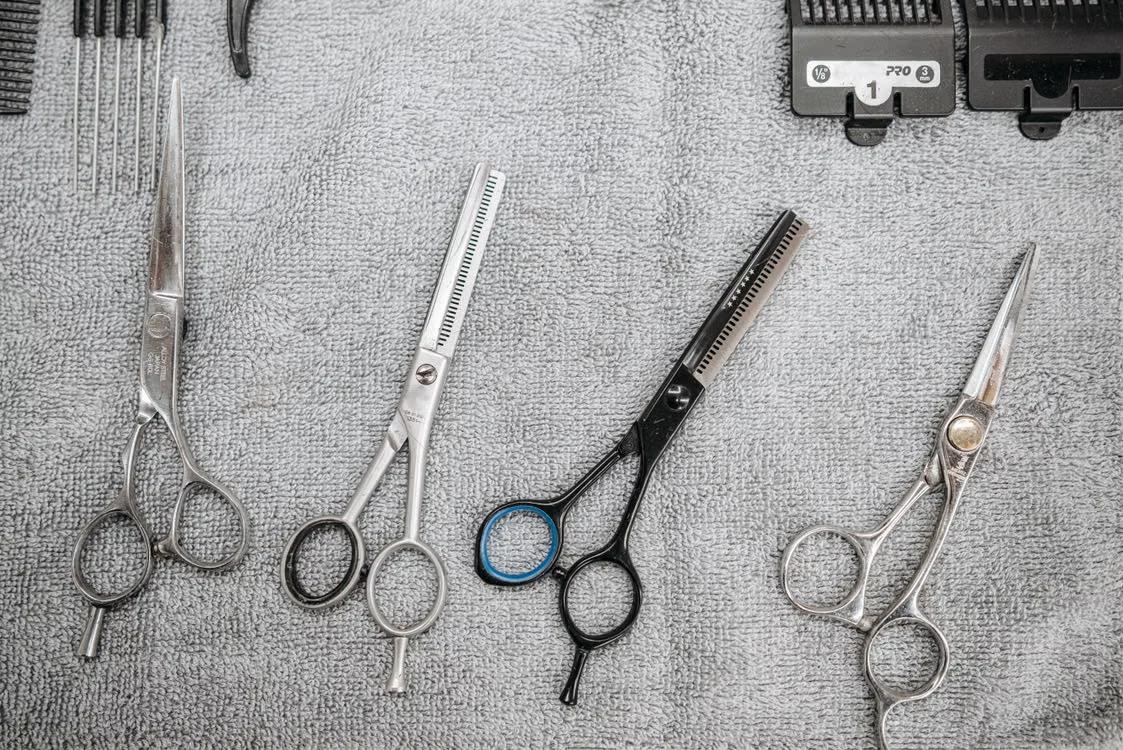
Regular shears have two sharp, smooth blades that create crisp lines. Thinning shears look unique since they feature one smooth blade – and one blade with teeth. These teeth have small grooves that only catch a percentage of the hair strand.
When you close the blades, you only cut some of the hairs instead of creating a straight line. This design allows you to soften heavy edges without changing the perimeter of the haircut. It gives you incredible control over the texture and movement of the finished look.
The handles often feature an ergonomic design to protect your wrist during long days. A finger rest helps you balance the tool as you work through dense sections.
The Primary Purpose Of Texturizing Tools
New stylists often struggle to manage thick, heavy sections during a haircut. Mastering the art of removing bulk from hair allows you to create seamless transitions without losing length. This technique prevents the final style from looking blocky or unnatural.
Clients appreciate this method when they want a lighter feel to their haircut. You can transform a thick bob or a heavy men’s cut into something soft and weightless. It makes styling much easier for your client when they go home.
Weight distribution alters how hair moves when the client walks. Heavy ends tend to lay flat and lose volume throughout the day. Lightening those areas gives the hair natural lift and bounce.
Key Differences Between Thinning And Blending Shears
You might hear senior stylists use different terms for these tools. An online guide from a beauty academy mentions that these tools work best for blending thicker strands. They help erase harsh lines left behind by your regular straight scissors.
A texturizing guide by an educational institution indicates that blending shears assist in creating beautiful texturized styles. True thinning shears often remove more hair per snip than traditional blending shears. Knowing which one you hold helps you avoid taking off too much hair at once.
Blending variations typically have more teeth spaced closely together. This setup creates a soft, diffused look that works perfectly for short clipper cuts.
How To Choose The Right Tooth Count
The number of teeth on your tool dictates how much hair you cut with every single clip. A training document from a vocational education platform points out that these shears excel at taking out excess weight.
When selecting your first pair, you should look at these elements:
- The spacing between each metal tooth.
- The presence of grooved notches on the tips.
- The length of the blades.
Using the right configuration prevents accidental holes in your shape. Beginners should start with a higher tooth count for safety. This choice gives you a wider margin for error as you practice.
Proper Hand Positioning And Technique
Holding these tools requires the same finger placement as your standard scissors. Keep your ring finger in the top ring and your thumb in the bottom ring. Your index and middle fingers rest along the shank for stability.
Always keep the moving blade on the bottom to maintain stability. Close the blades completely and open them fully before moving to the next section. This rhythmic motion prevents the teeth from pulling or snagging your client’s hair. It provides a comfortable experience for the client.
Keep your wrist straight to prevent fatigue during long salon shifts. Let your thumb do the actual cutting work as your other fingers stay completely still. This proper form protects your body from repetitive strain injuries throughout your career.
Image source:https://unsplash.com/photos/a-group-of-scissors-and-a-wallet-IcIezOAw4hg
Common Mistakes For Beginners To Avoid
The biggest error new stylists make is cutting too close to the scalp. This creates short, prickly hairs that stick straight up through the longer layers. Always start your cuts at least 1 to 2 inches away from the roots.
Another mistake is using the tool on wet hair without adjusting your tension. Hair shrinks as it dries, so you might remove far more bulk than intended. Practice on dry hair first to see exactly how the hair falls.
Avoid cutting the same section of hair multiple times in a row. Moving your shears down the hair shaft prevents harsh lines from forming. Spacing out your cuts creates the seamless blend you want.
Mastering this tool takes time and regular practice on your mannequins. As you get comfortable with the weight and motion, your blends will look smoother, and your heavy styles will gain beautiful movement. Keep your shears clean, oil them regularly, and trust your training. With patience, these specialized scissors will become a valuable asset in your salon toolkit.