Hardwood flooring can add warmth, character, and long-term value to a home, but the best results come from planning before materials arrive. Homeowners considering professional hardwood floor installation services in Tulsa should begin by assessing the room itself, including daily traffic, sunlight, pets, nearby doors, and potential moisture exposure.
A floor that looks great in a showroom may not be the right fit for every space, says Real Property Management Partners solutions. The wood species, plank width, surface texture, finish, installation method, and subfloor condition should work together. Taking time to make those decisions early can reduce delays, change orders, and surprises after installation begins.
Start With the Room, Not the Sample
Before choosing a stain color or grain pattern, consider how the room is used. A busy kitchen, entryway, family room, or home with active pets may benefit from a durable finish and a texture that makes small scratches less noticeable. Bedrooms and formal rooms may allow more flexibility because they usually receive less daily wear.
Sunlight matters too. Wood naturally changes color over time, especially in rooms with large windows. Area rugs, furniture placement, and window treatments can create uneven aging if the layout never changes. Think through how the new floor will meet tile, cabinetry, stairs, existing wood, and exterior doorways so transitions look intentional rather than improvised.
Choose Between Solid and Engineered Wood
Solid hardwood is made from a single piece of wood and can often be refinished multiple times over its lifespan. It can be an excellent choice for above-grade rooms with stable indoor conditions and a suitable wood subfloor. It is also a classic option for homeowners who value natural variation and the potential for future refinishing.
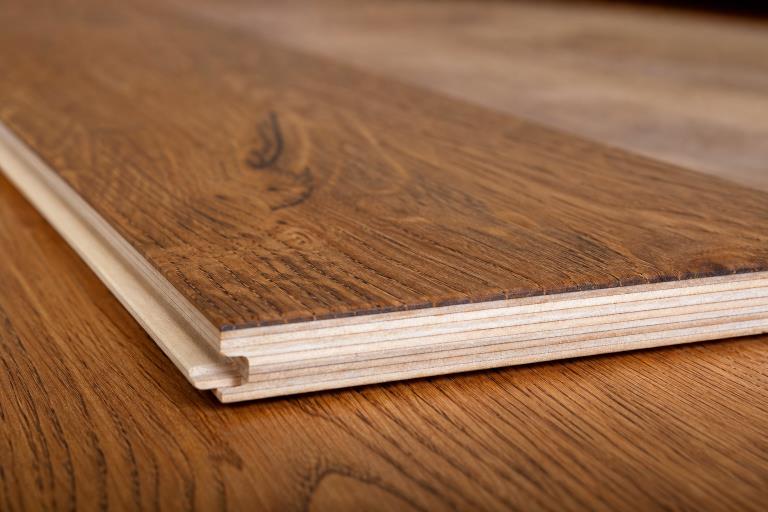
Engineered wood uses a real-wood surface over a layered construction. That design can offer greater dimensional stability in areas where humidity changes are more likely or where installation over concrete is being considered. Neither choice is automatically better. The correct product depends on the room location, subfloor, moisture conditions, product warranty, and approved installation method.
- Wide planks can create an open, modern appearance, but may show movement more noticeably in changing conditions.
- Textured or matte finishes can be more forgiving in homes with children and pets.
- Thicker wear layers may provide more refinishing options for certain engineered products.
- Manufacturer instructions should guide acclimation, underlayment, adhesives, fasteners, and cleaning methods.
Inspect the Subfloor Before Ordering
The subfloor is the foundation for every board above it. New hardwood cannot correct soft spots, major height differences, loose panels, old water damage, or persistent squeaks. A thorough inspection before ordering helps identify work that may affect the schedule and total cost.
Subfloor Checklist
- Check for movement, squeaks, stains, soft areas, and damaged sections.
- Confirm that the surface is sufficiently flat for the chosen flooring product.
- Look for leaks, condensation, or signs of moisture coming through the concrete.
- Identify old adhesive, staples, tile residue, or flooring that must be removed.
- Verify that the planned nail-down, glue-down, or floating method is suitable for the surface.
Prepare the Home for Installation
Preparation protects the home and gives installers room to work efficiently. Furniture should be removed or clearly addressed in the work agreement. Nearby surfaces may need protection, baseboards may need to be removed, and residents should plan for noise, dust, access limitations, and pets.
- Clear the work area and remove fragile items from nearby walls and shelves.
- Confirm the schedule, arrival window, and expected project duration.
- Review product instructions for storage, acclimation, and moisture testing.
- Discuss doors, appliances, trim, transitions, and furniture moving in advance.
- Plan where family members and pets will stay while work is underway.
Know the Main Installation Steps
Every project is different, but the process generally follows a predictable sequence. Installers measure the space, plan the layout, prepare the subfloor, install the flooring, complete trim work, and review the finished result. A detailed overview of the steps in hardwood floor installation can help homeowners understand why careful measuring, moisture checks, and perimeter spacing matter.
- Measure the space:Include closets, angled walls, doorways, and material waste.
- Plan the layout:Choose plank direction, starting points, board lengths, and transition locations.
- Prepare the base:Address flatness, squeaks, moisture, debris, and damaged areas.
- Install the flooring:Use the approved method for the product and subfloor.
- Allow for movement:Leave the required space around walls and fixed objects.
- Finish the perimeter:Add trim, thresholds, transitions, and final touch-ups.
Build a Realistic Budget
The material price is only one part of the project. A complete budget should include flooring, delivery, labor, underlayment, removal of old flooring, disposal, subfloor repair, trim, thresholds, stair work, furniture moving, and potential finishing services. Complex patterns, narrow hallways, built-ins, and irregular rooms can also increase labor.
Set aside a contingency amount for hidden conditions. Water damage under old flooring, uneven surfaces, loose subfloor panels, and unexpected trim repairs are difficult to price accurately until the work area is opened. A clear scope of work makes it easier to distinguish included services from legitimate change orders.
Compare Installers and Written Estimates
The lowest estimate is not always the best value. Compare proposals based on what is included, how the subfloor will be evaluated, who supplies materials, and how unexpected conditions will be handled. A useful written estimate should identify the installation method, payment stages, project timing, cleanup expectations, and warranty details.
Questions to Ask Before Hiring
- Who will perform the installation, and who supervises the work?
- How will moisture, flatness, and subfloor repairs be evaluated?
- Who removes old flooring, moves furniture, and reinstalls trim?
- What happens if hidden damage or additional preparation is discovered?
- What care instructions and written warranty information will be provided?
Protect the Floor After Installation
Small habits make a meaningful difference. Grit brought in on shoes can scratch a finish like fine sandpaper, while standing water can damage wood and seams. Sweep or vacuum regularly with a floor-safe attachment, clean spills promptly, and use products approved for the specific finish.
- Use walk-off mats near exterior doors.
- Place felt pads beneath furniture legs.
- Lift furniture instead of dragging it across the floor.
- Keep wet shoes, pet water spills, and standing water away from wood.
- Maintain indoor humidity within the flooring manufacturer’s recommended range.
Common Homeowner Questions
How long does hardwood installation take?
Timing depends on room size, material acclimation, subfloor preparation, pattern complexity, trim work, and whether finishing is needed. A clear single-room project may move quickly, while a whole-home installation often requires multiple stages.
Can hardwood flooring be installed in every room?
Rooms with elevated moisture exposure, including bathrooms, basements, kitchens, and entryways, need extra planning. Product instructions, ventilation, subfloor type, and the likelihood of spills should guide the decision.
Should existing hardwood be replaced or refinished?
Refinishing may be practical when the floor is structurally sound, and damage is limited to the surface. Replacement may be the better choice when boards have widespread water damage, significant movement, deep wear, or recurring moisture problems.
Conclusion
A hardwood flooring project succeeds when the room, material, subfloor, installation plan, budget, and maintenance routine are treated as a single, cohesive system. With careful planning and clear communication before work begins, homeowners can choose a floor that looks good now and performs well for years to come.