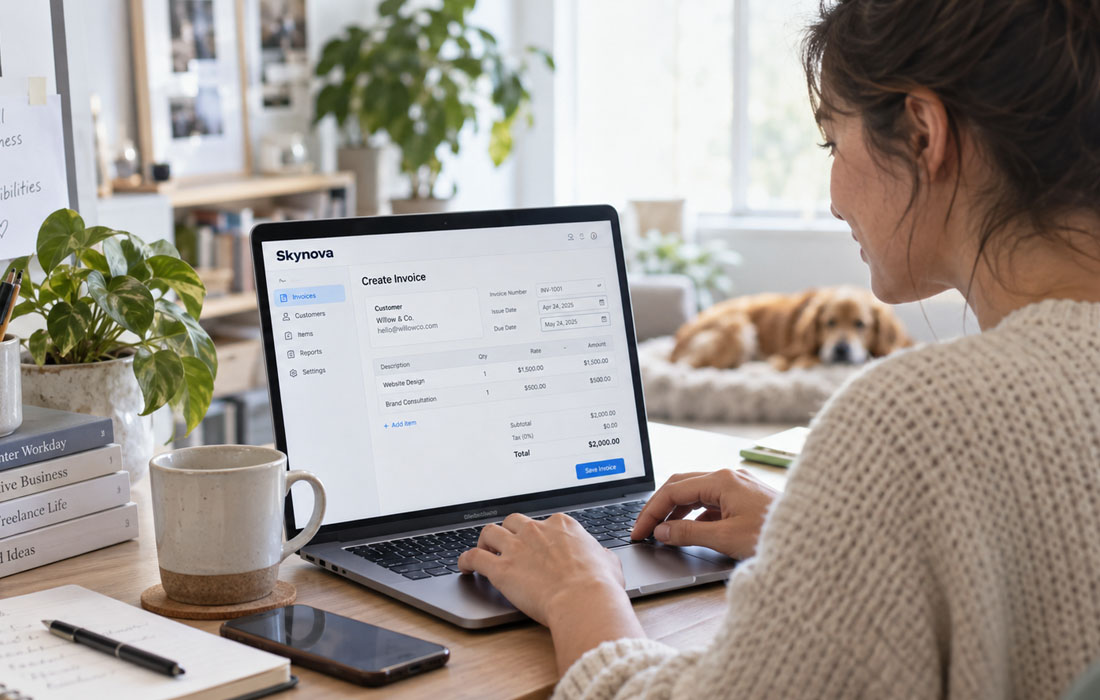
If you’re new to Skynova, getting started with skynova invoices might feel like one more thing to figure out when you’ve already got enough on your plate. The good news? Once you understand the basic invoicing workflow, it can become a pretty straightforward part of your routine. Whether you’re a freelancer, contractor, small-business owner, or someone handling invoices for a growing company, a clear invoice helps you look professional and makes it easier to keep track of money coming in.
So, let’s break it down.
What Is Skynova?
Skynova is an online business software platform designed to help small businesses manage everyday tasks. Its tools include invoicing and other business-management features.
For someone just getting started, the main attraction is simple: you can handle important business paperwork without having to build an invoicing system from scratch.
And when you’re juggling customers, projects, payments, and expenses, keeping things simple can make a world of difference.
Why Are Invoices Important?
An invoice isn’t just a bill you send to a customer.
It creates a written record of what you sold, who you’re billing, how much they owe, and when payment is expected. A well-prepared invoice can also reduce confusion between you and your customer.
Think of it as a paper trail for your sale.
A good invoice generally includes:
- Your business name and contact information
- Customer information
- Invoice number
- Invoice date
- Products or services provided
- Quantity or hours
- Price
- Taxes or applicable charges
- Total amount due
- Payment terms
- Due date
- Any additional notes
Getting these details right from the start can save you a headache later.
How to Create an Invoice in Skynova
If you’re ready to create your first invoice, the process is easiest when you take it one step at a time.
1. Sign In to Your Skynova Account
Start by signing in to your Skynova account.
Once you’re inside, look for the invoicing section or the option related to creating a new invoice. Skynova’s interface may change over time, so the exact wording or location of buttons can vary.
Don’t worry if the screen looks slightly different from a tutorial you watched previously. Focus on the invoicing function rather than a specific button name.
2. Choose the Option to Create a New Invoice
Next, select the option for creating a new invoice.
This is where you’ll begin entering the information for your customer and the transaction.
Before filling everything out, it’s worth having the important details nearby. A few minutes of preparation can prevent mistakes later.
3. Add Your Customer’s Information
Enter the customer’s information carefully.
Depending on the information your business needs, this may include:
- Customer or company name
- Billing address
- Email address
- Phone number
- Other relevant contact details
Double-check spelling, especially for business names. An invoice with incorrect customer information can look sloppy and may cause unnecessary confusion.
4. Add Your Products or Services
Now comes the heart of the invoice: what you’re actually charging for.
Describe each product or service clearly. If you’re providing a service, avoid vague descriptions such as “work completed.”
Instead, use a description that tells the customer what they’re paying for.
For example:
Website maintenance — 5 hours
is much clearer than:
Services — $250
A customer shouldn’t have to play detective to understand an invoice.
5. Enter the Price and Quantity
Add the quantity, hours, rate, or other pricing information that applies to the transaction.
For example, if you completed 5 hours of work at $40 per hour:
5 × $40 = $200
If you’ve added multiple products or services, review each line carefully before moving on.
A small number entered incorrectly can throw off the entire invoice.
6. Check Taxes and Additional Charges
If your business needs to charge sales tax or another applicable charge, make sure the appropriate information is included.
Tax requirements can vary depending on your location, business structure, products or services, and other circumstances. When you’re unsure, it’s best to check with a qualified tax professional or the relevant tax authority rather than guessing.
7. Review the Invoice Total
Before sending anything, stop for a second and review the numbers.
Check:
- Subtotal
- Discounts
- Taxes
- Additional charges
- Final total
This is one of those small steps that can save you a big headache.
If the customer expects to pay $500 and your invoice says $5,000, you probably don’t want to discover that after hitting send!
8. Add Payment Terms and a Due Date
Clear payment terms tell your customer when payment is expected.
For example, you might specify that payment is due within a certain number of days after the invoice date.
Whatever terms you use, make sure they’re consistent with the agreement you have with your customer.
Clear expectations upfront are usually better than chasing payments later.
9. Review Everything Before Sending
Here’s the part that’s easy to skip—and probably shouldn’t be.
Read through the entire invoice before sending it.
Look for:
- Typing mistakes
- Wrong customer information
- Incorrect prices
- Missing services
- Incorrect quantities
- Tax errors
- Wrong invoice numbers
- Incorrect due dates
Once everything looks right, you’re ready for the next step.
10. Send the Invoice to Your Customer
After reviewing your invoice, use the available Skynova option to send or otherwise deliver it to your customer.
Make sure you’re sending it to the correct email address or using the appropriate delivery method for your business.
And that’s it. Your invoice is on its way.
What Makes a Good Skynova Invoice?
Creating an invoice is one thing. Creating a good invoice is another.
A professional invoice should be:
Clear
The customer should immediately understand what they’re being charged for.
Accurate
Prices, quantities, taxes, and totals should all match your records.
Professional
Use consistent business information and descriptions. Your invoice is part of your customer-facing communication.
Easy to Understand
Avoid unnecessary jargon. If a customer has to read an invoice three times to figure out what it means, something’s gone sideways.
Easy to Track
Using consistent invoice numbers and keeping your records organized makes it easier to locate an invoice later.
Common Skynova Invoice Mistakes to Avoid
Even a simple invoicing process can go wrong. Here are a few mistakes worth avoiding.
Sending an Invoice Without Checking It
Never rush through the final review.
A wrong total or incorrect customer email can create unnecessary back-and-forth.
Using Unclear Descriptions
Your customer should know what they’re paying for without needing to contact you for an explanation.
Forgetting the Due Date
A missing due date can make payment expectations unclear.
Mixing Up Invoice Numbers
Use a consistent numbering system so invoices are easy to identify.
Forgetting to Keep Records
Don’t treat an invoice as something that disappears after you’ve sent it. Keep appropriate records for your business and accounting needs.
Skynova Invoices for Small Businesses
For small businesses, invoicing isn’t just about getting paid. It’s also about organization.
When invoices are handled consistently, it’s easier to understand which customers have been billed, what services were provided, and which payments still need attention.
That’s especially useful when your business starts getting busier.
At first, you might have only a handful of invoices each month. Then, almost overnight, you’re dealing with dozens. A system that felt unnecessary at the beginning can suddenly become a lifesaver.
A Simple Invoice Workflow
If you’re new to Skynova, don’t overcomplicate things.
A basic workflow looks like this:
Create → Review → Send → Track → Record payment
That’s the whole idea.
Create the invoice with accurate information, review it carefully, send it to the customer, and keep track of what happens afterward.
Once you’ve done it a few times, the process should feel much more natural.
Frequently Asked Questions
What is Skynova used for?
Skynova is an online platform that provides business-management tools, including invoicing features for businesses and professionals.
Can beginners use Skynova for invoicing?
Yes. Its invoicing functionality is designed to help users create and manage business invoices without needing to build an invoicing system themselves.
What should I include on a Skynova invoice?
At minimum, include relevant business and customer information, an invoice number, invoice date, a description of the products or services, pricing, applicable taxes or charges, the total amount due, and payment terms.
How can I avoid invoice mistakes?
Review every invoice before sending it. Pay particular attention to customer details, invoice numbers, prices, quantities, taxes, totals, and payment terms.
Is an invoice the same as a receipt?
No. An invoice generally requests payment for goods or services. A receipt typically confirms that payment has already been received.
Final Thoughts
Starting with a new invoicing platform can seem a little daunting, but it doesn’t have to be.
The trick is to take it one invoice at a time. Add the customer information, describe the work clearly, enter the correct numbers, check everything twice, and send it when you’re happy with the details.
Before long, creating Skynova invoices can become just another routine part of running your business.
And honestly, that’s exactly what good invoicing software should do—take a task that could become a mess and make it feel much more manageable.