Popcorn ceilings (also called stucco or textured ceilings) were standard in homes built between the 1950s and the late 1980s. They were popular because they hid drywall imperfections and sound-deadened rooms cheaply. They went out of style decades ago, and most homeowners who still have them want them gone. The texture looks dated, collects dust and cobwebs, and limits what a room can look like even after expensive renovations elsewhere. The good news is that popcorn ceiling removal is a real, well-defined process that produces dramatically better-looking rooms. The longer news is that the process has details worth understanding before you commit.
Working with specialists in popcorn ceiling removal Toronto makes a real difference in how the project goes. Dedicated specialists have the equipment, training, and protocols to do this work cleanly and quickly. General contractors who include this in their offerings sometimes handle it well, sometimes do not. The cost difference between specialist and generalist is usually small relative to the result quality.
Why this is a popular project right now
Popcorn ceiling removal sits within Canada’s significant home improvement spending. Canadian homeowners are spending over $19,000 on average in home improvements, with ceiling and wall updates being a common category. Removing dated textured ceilings dramatically modernizes rooms with relatively low investment compared to other renovation work, which keeps it popular even when budgets are tight.
The first thing to address: asbestos
Homes built or renovated before the mid-1980s may have popcorn texture containing asbestos. This is the single most important issue to address before any removal starts.
Testing is straightforward: a small sample is collected and sent to a certified lab. Results typically come back within a week. The cost is modest. If asbestos is present, removal requires certified abatement specialists working under specific protocols. Disturbing asbestos-containing material without proper protocols creates serious health risks and regulatory violations.
Reputable contractors will not skip this step. Be cautious of anyone who suggests testing is unnecessary or wants to start work immediately without it. The few days and modest cost for testing are negligible compared to the risk of disturbing asbestos improperly.
The general removal process
Assuming no asbestos concerns, the process for a typical popcorn ceiling removal:
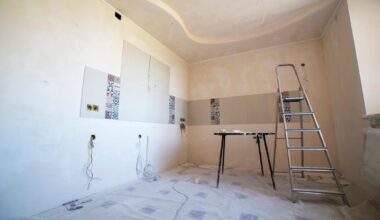
- Site protection. Furniture is moved or covered. Floors are protected with plastic and drop cloths. Walls are protected as needed. Light fixtures and ceiling vents are removed or protected. HVAC openings are sealed to prevent dust spread.
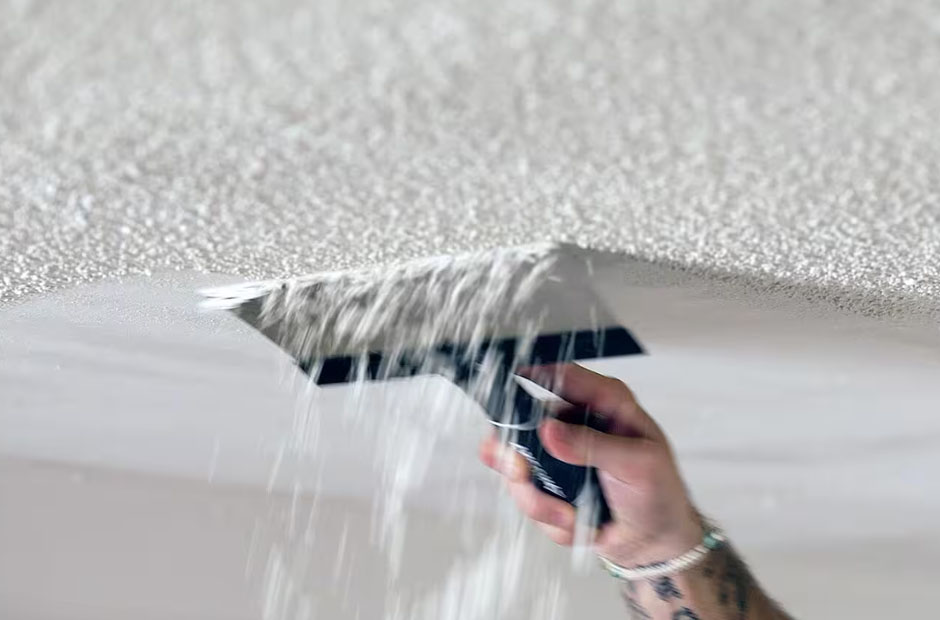
- Texture removal. The texture is typically softened with water spray and scraped off with specialized scrapers. Dustless equipment captures most of the debris during scraping, though some cleanup is always needed.
- Surface preparation. Once the texture is off, the underlying drywall typically needs work: damaged areas patched, tape and joint compound repaired where the texture removal exposed issues, screw pops addressed.
- Skim coating. A thin layer of joint compound is applied across the entire ceiling to create a smooth, uniform surface. This usually requires multiple coats with sanding between coats.
- The skim-coated surface needs primer before paint. The right primer matters for the final paint job to look right.
- Final paint, typically two coats of ceiling paint, produces the finished result.
- Cleanup and inspection. The work area is cleaned, fixtures are reinstalled, and the result is inspected under proper lighting to identify any imperfections needing touch-up.
Time expectations
For a typical room (around 200 to 500 square feet of ceiling), specialist contractors usually complete the work in two days. The first day handles texture removal and initial repair work. The second day handles skim coating, sanding, priming, and painting.
Larger areas (open-concept main floors, multiple rooms simultaneously) extend the timeline proportionally. A whole-house popcorn removal might take a week or more.
DIY attempts at popcorn removal almost always take longer than people expect, often dramatically longer. What looks like a weekend project routinely stretches across weeks of evening work.
Why dust control matters
One of the biggest differences between specialist work and amateur work is dust management. Properly contained popcorn removal contains the dust to the work area and captures most of it during the work itself. Improperly managed removal spreads drywall dust throughout the home.
Drywall dust gets into HVAC systems, electronics, fabrics, books, and every surface in the home. Cleaning it up after the fact takes days and is never fully successful. The right equipment and protocols (dustless sanding tools, containment barriers, HEPA filtration, proper ventilation) prevent the dust spread in the first place.
Asking specifically about dust control during the quote phase reveals which contractors actually have the right setup and which will create a mess you spend weeks cleaning.
Working with existing electrical and fixtures
Popcorn ceiling removal projects often coincide with electrical updates: replacing old fixtures, adding pot lights, repositioning fixtures, or upgrading switches. If you are planning electrical changes, doing them during the popcorn removal project is usually more economical than doing them separately. The ceiling will be open during the work, and patching after electrical changes is straightforward when the ceiling is already being skim-coated.
Discussing electrical plans during the quote phase lets the contractor coordinate and price the combined work properly.
The end result
Well-executed popcorn ceiling removal produces a dramatically updated room. Smooth white ceilings reflect light better, look modern, and free design choices elsewhere in the room from competing with a dated texture. The visual upgrade often makes the room feel larger and more contemporary even before other changes.
Beyond aesthetics, smooth ceilings are easier to maintain. Dust does not accumulate the way it does on textured surfaces. Cobwebs are easier to remove. Repainting in the future is simpler. The ongoing benefits compound over years of living with the result.
Cost realities
Pricing varies by region, ceiling complexity, and project specifics, but specialist popcorn removal in Toronto typically runs $6 to $10 per square foot. A 300-square-foot room comes in at roughly $1,800 to $3,000 for complete removal and finishing.
This may seem like a lot for a ceiling, but the alternatives (living with the dated look, attempting DIY and likely needing professional help anyway, or doing a more expensive full renovation) usually compare unfavorably. Among home improvements, popcorn removal delivers a high ratio of visible improvement to cost.