Restoring old furniture can turn a worn table, cabinet, chair, or dresser into a distinctive piece for the home. The process may involve removing old finishes, repairing damaged timber, sanding surfaces, replacing hardware, and applying a new finish. Before beginning, organize the workspace and consider the tools and task-appropriate protective equipment needed for each stage, which may include arm protectors when working around sharp edges, abrasive materials, or other relevant hazards.
Inspect the Furniture First
Don’t begin sanding immediately.
Starting with a clean surface makes it easier to assess the condition of the underlying material and determine how much additional preparation is required, observe RPM Excel specialists.
Look for:
- Loose joints
- Cracks
- Missing hardware
- Damaged surfaces
- Water marks
- Peeling finishes
- Broken components
This will help you determine whether the project requires a simple cosmetic refresh or more substantial repairs.
Decide What You Want to Preserve
Older furniture often contains details that give it character.
Before removing the existing finish, decide which features should remain.
These might include:
- Original hardware
- Decorative carvings
- Natural imperfections
- Aged timber
- Distinctive handles
Restoration doesn’t necessarily mean making an old piece look completely new.
Sometimes preserving signs of age creates a more interesting finished result.
Clean Before Sanding
Years of dirt, grease, polish, and other residue can accumulate on furniture.
Clean the piece appropriately before beginning more intensive work.
Starting with a clean surface makes it easier to assess the condition of the underlying material and determine how much additional preparation is required.
Allow the furniture to dry properly before moving on.
Complete Structural Repairs First
Decorative work should generally wait until the furniture is stable.
Check whether joints need attention and whether damaged components require repair or replacement.
Depending on the project, this could involve:
- Tightening hardware
- Repairing joints
- Replacing damaged sections
- Filling appropriate imperfections
- Securing loose components
There’s little benefit in creating a beautiful finish on a piece that remains structurally unstable.
Remove Old Finishes Carefully
The appropriate method depends on the furniture and its existing finish.
Some projects may require sanding, while others can involve different removal or preparation techniques.
Avoid immediately using the most aggressive method available.
Removing too much material can damage details and change the shape of edges or decorative features.
For older furniture with unknown coatings, additional precautions or professional assessment may be appropriate before disturbing the existing finish.
Take Your Time With Sanding
Surface preparation can make a major difference to the final result.
Work methodically rather than trying to remove everything as quickly as possible.
Pay particular attention to:
- Corners
- Edges
- Detailed sections
- Previously repaired areas
- Flat surfaces
The goal is to create an appropriate surface for the finish you’re planning to apply without unnecessarily removing good material.
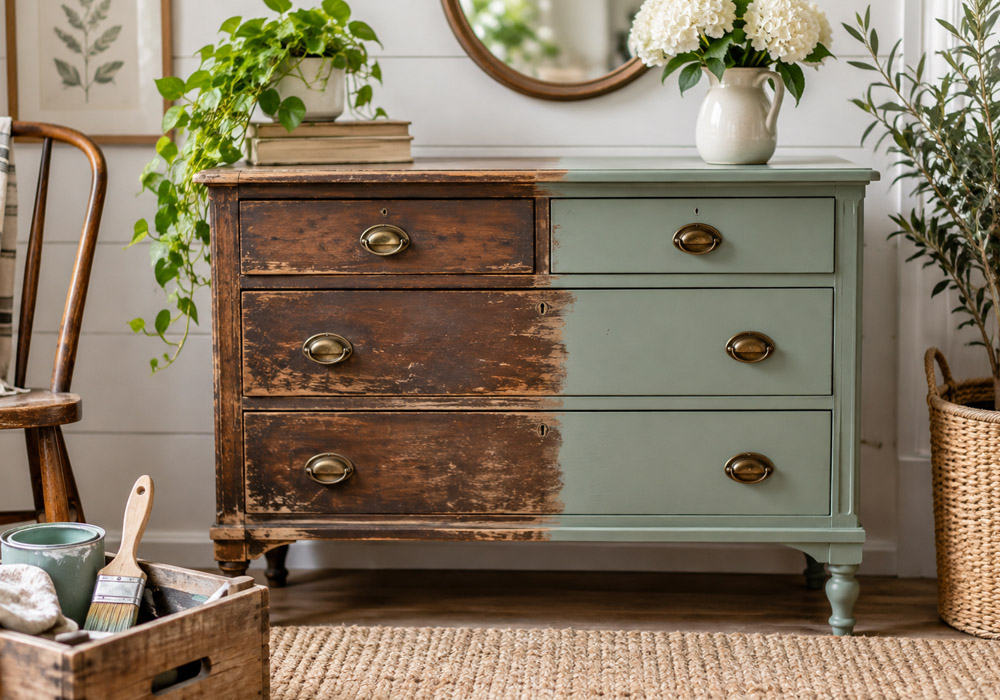
Choose Between Paint and Natural Wood
Once preparation is complete, decide how you want the furniture to look.
Natural Wood Finish
This can highlight the grain and character of attractive timber.
Painted Finish
Painting can work well when the existing surface is heavily marked or when the piece needs to fit a particular interior design.
The best option depends on the condition, material, age, and intended appearance of the furniture.
Update the Hardware
Handles, knobs, hinges, and other hardware can dramatically change the appearance of a piece.
If the original hardware is in good condition, consider cleaning and reusing it.
Alternatively, replacing damaged or unsuitable hardware can give the furniture a different character.
Keep the overall style of the piece in mind when choosing replacements.
Create a Suitable Work Area
Furniture restoration can generate dust, debris, and fumes depending on the techniques and products being used.
Set up a dedicated work area rather than attempting the project in the middle of a finished room.
A garage, workshop, or other suitable space may provide more room for:
- Tools
- Sanding
- Repairs
- Drying
- Finishing
Follow product instructions and consider ventilation requirements for any finishes or other materials being used.
Don’t Rush the Finish
After spending hours preparing a piece, it can be tempting to rush through the final stages.
Follow the manufacturer’s instructions for the product you’re applying, including preparation, application, drying, and curing requirements.
Trying to move or use furniture too quickly can damage an otherwise successful restoration.
Reassemble and Inspect
Once the appropriate finish has dried or cured, reinstall removed hardware and inspect the entire piece.
Check:
- Drawers
- Doors
- Handles
- Hinges
- Joints
- Legs
Make any final adjustments before moving the furniture back into the home.
Final Thoughts
Furniture restoration can be a rewarding way to develop practical DIY and woodworking skills while giving older pieces a second life.
Start with a careful inspection, complete structural repairs before cosmetic work, and take your time during surface preparation. With patience and thoughtful finishing, an overlooked piece of furniture can become one of the most distinctive features in a room.