Removing a tree can make a yard look finished in a day, but the work below ground often continues much longer. Whether you are dealing with a stump, a sunken patch of lawn, exposed roots, or plans for a replacement tree, a thoughtful recovery plan helps protect the property and gives new plants a better start. Professional tree cutting and removal services can address the tree itself, while the next steps determine how well the cleared space works for years to come.
Start by deciding what the area should become. A lawn repair project, a garden bed, a patio extension, and a new tree-planting site all require different preparations. Large roots and buried wood may remain even after the visible trunk is gone, so avoid treating the area as ordinary ground until it has been inspected and cleaned up.
Table Of Contents
- The First Steps After Tree Removal
- Choosing What To Do With The Stump
- Why The Soil May Need Repair
- How To Restore Grass And Ground Cover
- When And Where To Plant A New Tree
- A Simple Replanting Process
- Common Mistakes To Avoid
- Safety And Local Rules
- A Final Property Checklist
The First Steps After Tree Removal
Before adding topsoil or mulch, walk the site carefully. Keep children and pets away from the work area, and look for sharp branch pieces, nails, wire, uneven ground, or exposed roots. Take photos before altering the surface, especially if the removal work occurred near a fence, walkway, irrigation line, or landscape feature. Those photos can make it easier to document damage or track settling later.
Check the ground after the first substantial rain as well. Water that pools at the former tree location may indicate compaction, a low spot, or a drainage issue that needs attention before planting. Establishing the intended use of the area early prevents wasted work, such as seeding grass where excavation will soon be needed.
Choosing What To Do With The Stump
There is no universal best choice for every stump. The right approach depends on the site, future plans, budget, and safety concerns.
- Grinding reduces the stump below ground level and is often practical when the goal is a smoother lawn or planting bed.
- Excavation removes more of the stump and root crown, but it can disturb a larger section of the yard.
- Natural decay may be reasonable in a low-traffic part of a property where the stump creates no hazard or obstacle.
- A habitat log can be left in a suitable naturalized area, provided it is well away from structures, paths, and play spaces.
Grinding usually leaves chips and underground roots, while excavation can leave a sizeable hole that needs careful filling and grading. Burning stumps and using chemical stump treatments can create fire, soil, or regulatory concerns, so check applicable local requirements before considering either option.
Why The Soil May Need Repair
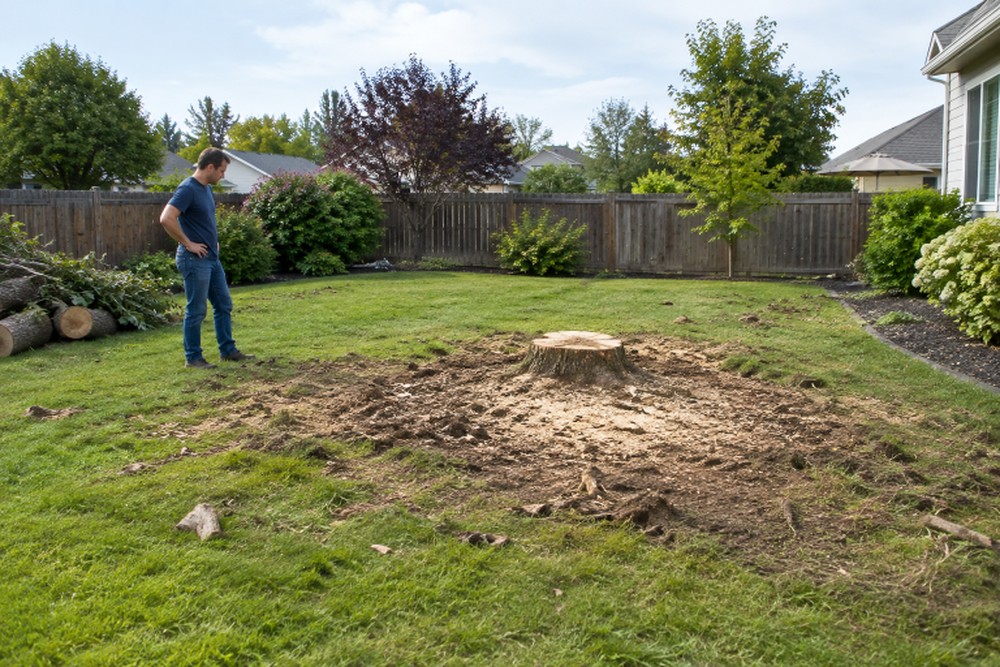
Stump grindings, sawdust, decaying roots, and heavy equipment can all affect the site. Wood debris mixed into soil can temporarily reduce nitrogen available to newly established grass, and larger buried pieces may create air pockets that settle as they decay. Guidance on planting grass after stump removal also emphasizes removing wood debris, correcting compaction, and replacing lost volume with quality topsoil.
A Simple Site Check
- Rake out loose chips, sawdust, and larger root fragments.
- Observe whether water drains normally or remains on the surface.
- Loosen compacted soil without overworking wet ground.
- Add clean topsoil where grinding or settling has created a depression.
- Use a soil test before applying fertilizer or large amounts of compost.
How To Restore Grass And Ground Cover
A reliable lawn repair begins with a clean, level growing surface. Remove as much sawdust and wood material as practicable, fill the low area with appropriate topsoil, and leave it slightly higher than the surrounding grade, as additional settling may occur. Smooth the surface without packing it hard, then select seed or sod that fits the season, sunlight, and grass type used in the rest of the yard.
Seed is useful for matching an existing lawn or gradually covering a larger space. Sod provides immediate coverage but still requires consistent watering while it takes root. In deep shade or difficult areas, a mulched planting bed or low-growing shade-tolerant plants may be a better long-term fit than repeatedly reseeding thin turf. Watch for yellowing grass, dry soil, and new low spots during the first growing season.
When And Where To Plant A New Tree
The exact location of the removed tree is not always the best place for its replacement. Remaining roots can limit room for new roots, leftover grindings can alter soil conditions, and the original tree may have been removed because of a pest, disease, poor drainage, or crowding problem. When space allows, plant the new tree several feet away from the old stump area rather than directly into it.
Choose the new location with the mature tree in mind. Consider sunlight, drainage, overhead utility lines, roof clearance, pavement, foundations, and the eventual spread of branches and roots. If disease or pests contributed to the original tree’s decline, select a replacement species that is not susceptible to the same issue. Guidance for correctly installing and maintaining replacement trees also highlights the importance of establishing good structure and care from the beginning.
A Simple Replanting Process
- Choose for the site. Match the species to local climate, soil, moisture, available light, and mature size.
- Prepare the area. Clear leftover stump material and address compacted or poorly drained soil.
- Dig a wide planting hole. Give roots room to spread naturally instead of forcing them into a narrow opening.
- Set the tree at the proper depth. Keep the root flare at or slightly above the finished soil level.
- Backfill and water. Use the excavated soil when suitable, water slowly, and eliminate large air pockets.
- Mulch thoughtfully. Apply a modest layer of mulch over the root area, but keep it away from the trunk.
- Monitor regularly. Adjust watering for rainfall and soil conditions, and watch for settling, wilting, pests, or sprouts from old roots.
Common Mistakes To Avoid
- Planting grass or a tree directly into fresh stump grindings.
- Hiding buried wood beneath only a thin layer of soil.
- Putting a replacement tree too close to the former root system.
- Choosing a tree for quick growth without considering mature dimensions.
- Burying the root flare under soil or thick mulch.
- Applying fertilizer without knowing the soil condition or plant needs.
- Ignoring low spots and settling after the first round of repairs is complete.
Safety And Local Rules
Do not dig near utilities, burn a stump, apply chemicals, or operate unfamiliar heavy equipment without first checking the risks and local requirements. City, county, homeowner association, and utility rules may differ. Keep away from damaged power lines, hanging limbs, unstable soil, and large root systems. When the work involves climbing, electrical hazards, or major excavation, contact a qualified professional.
A Final Property Checklist
- Is the stump removed, ground, or safely managed?
- Have excess chips, sawdust, and root pieces been cleared?
- Has the soil been inspected for compaction, drainage, and settling?
- Is the next use of the space clearly planned?
- Will new plants fit the site at maturity?
- Is there a practical watering and monitoring plan?
- Have safety issues and local requirements been reviewed?
Conclusion
Tree removal is the beginning of a new landscape decision, not simply the end of an old tree. By managing the stump, repairing disturbed soil, leveling the ground, and choosing plants suited to the site, homeowners can turn an empty patch into a stable lawn, a productive planting bed, or a healthy location for a new tree.